[Day27] 쇼핑몰 실습 - 중요 정보 처리 & 회원 가입
오늘은 백엔드에서 중요한 정보를 관리하는 방법에 대해서 배웠다.
유레카 교육이 시작한 후 계속해서 보안의 중요성에 대해 들었지만, 직접 코드에 적용을 해본 경험은 처음이라 어떤 보안이 중요하고, 이를 어떻게 적용하는지 알 수 있었다.
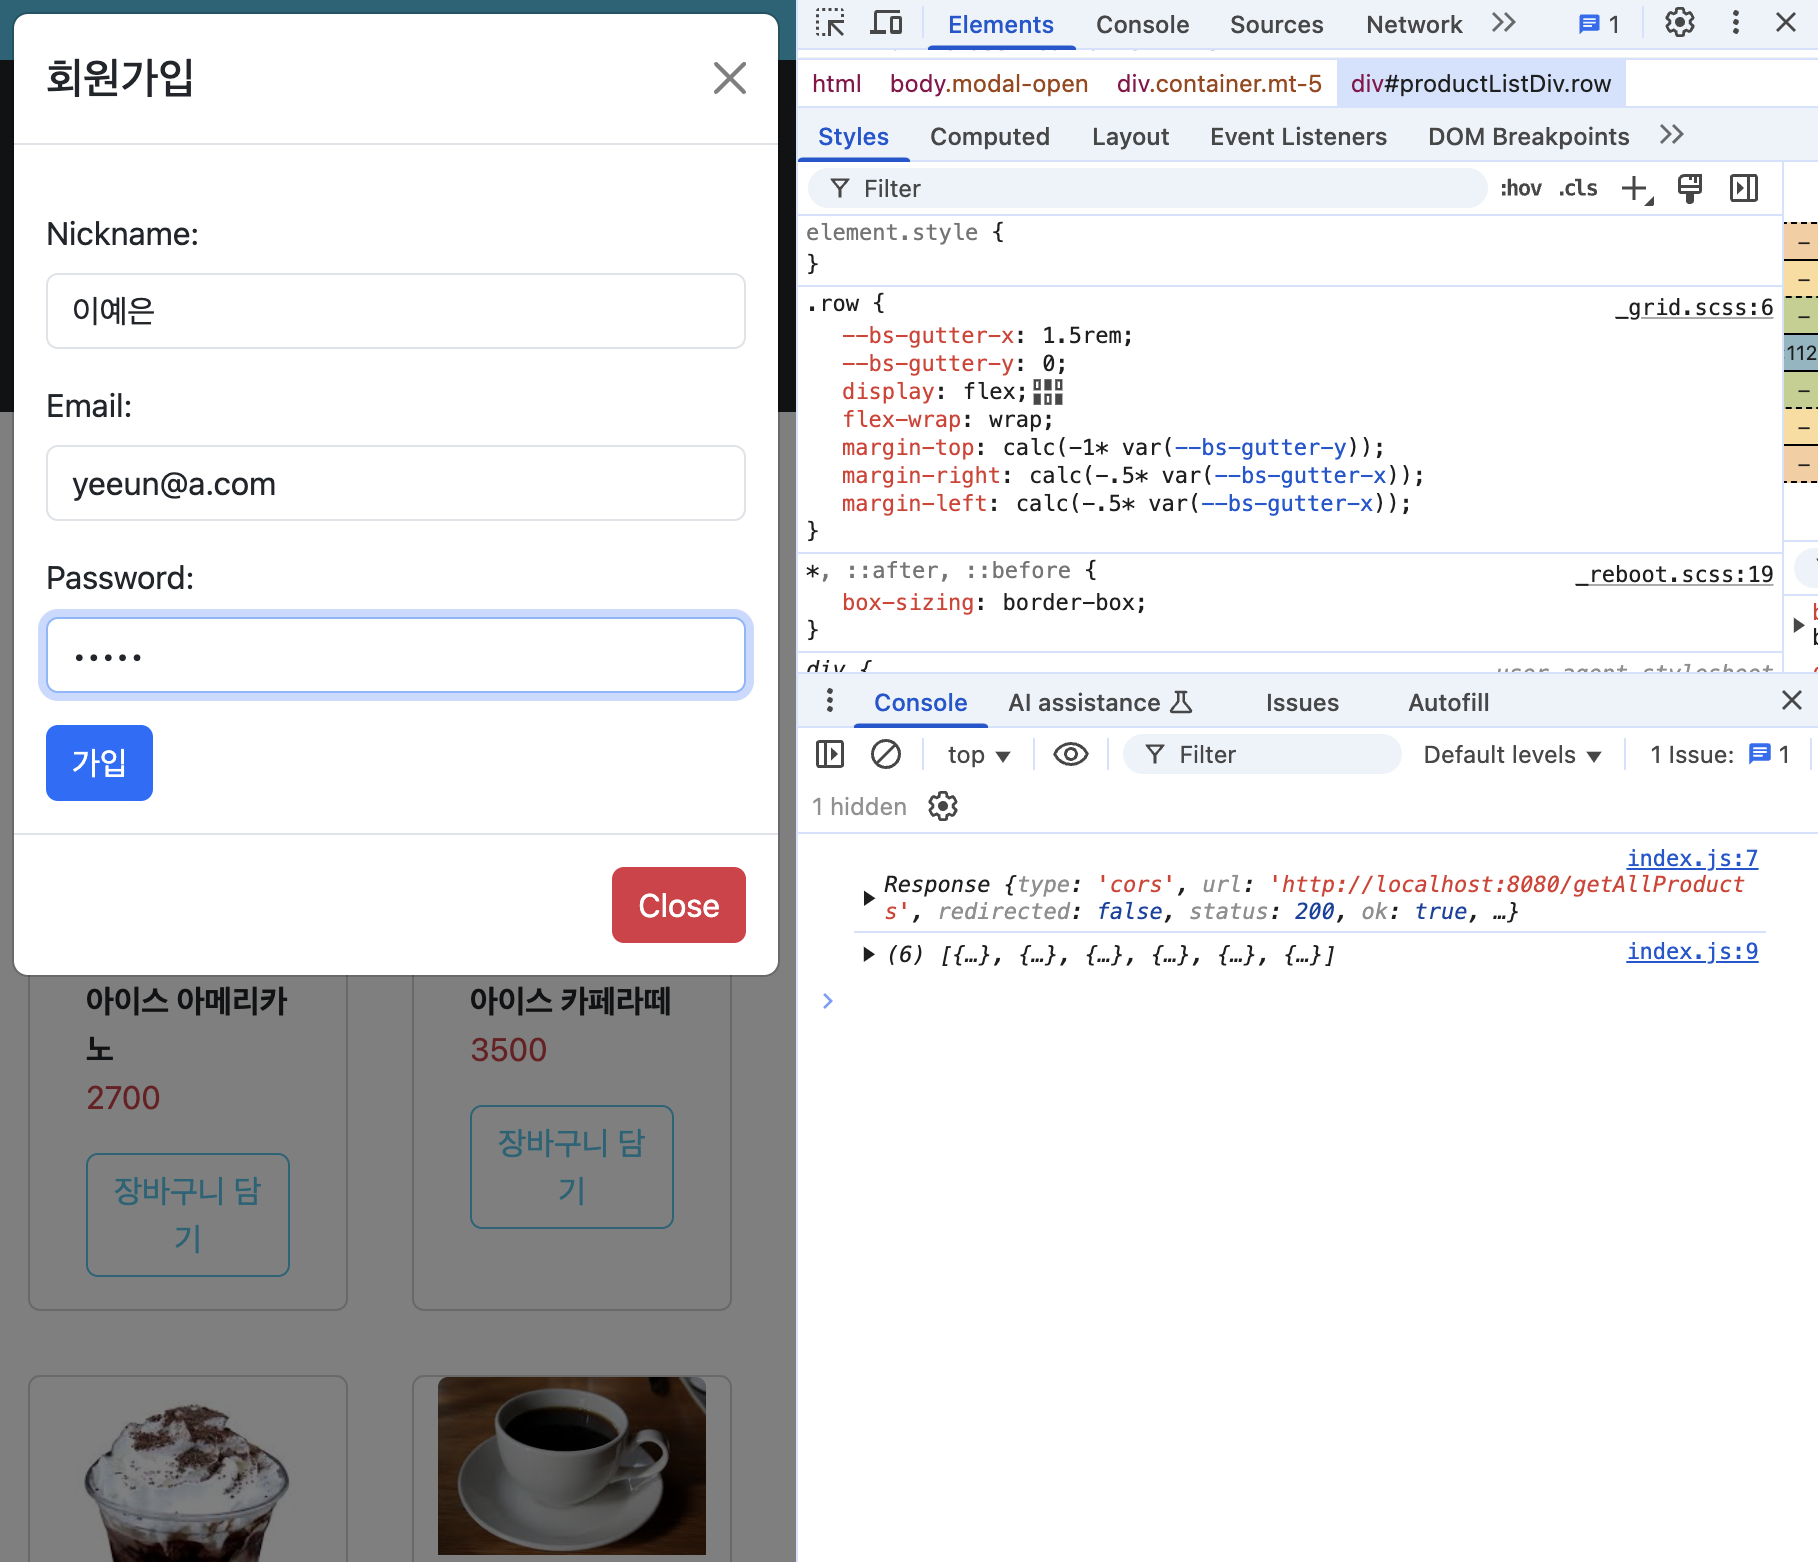
오후에는 회원 가입과 로그인 기능까지 구현을 했다.
뭔가 풀스택으로 기능을 구현하는거같아서 신기하기도 했지만 내가 이해를 하는게 맞나 싶고, 백엔드 코드에 대해 자꾸만 의문이 생겨서 오늘은 머리가 완전 과부하였다,,
재밌지만 머리는 아픈..
아무튼 로그인 기능은 이해가 좀 안되서 내일 다시 듣고 정리해야겠다 !
Spring Boot에서 중요한 정보를 안전하게 관리하는 방법
- DB 접속 정보(아이디, 비밀번호 등)는 코드에 직접 적지 않는다.
- .properties 파일을 활용하여 별도로 관리한다.
- .gitignore를 이용해 보안이 필요한 파일을 Git에 올리지 않는다.
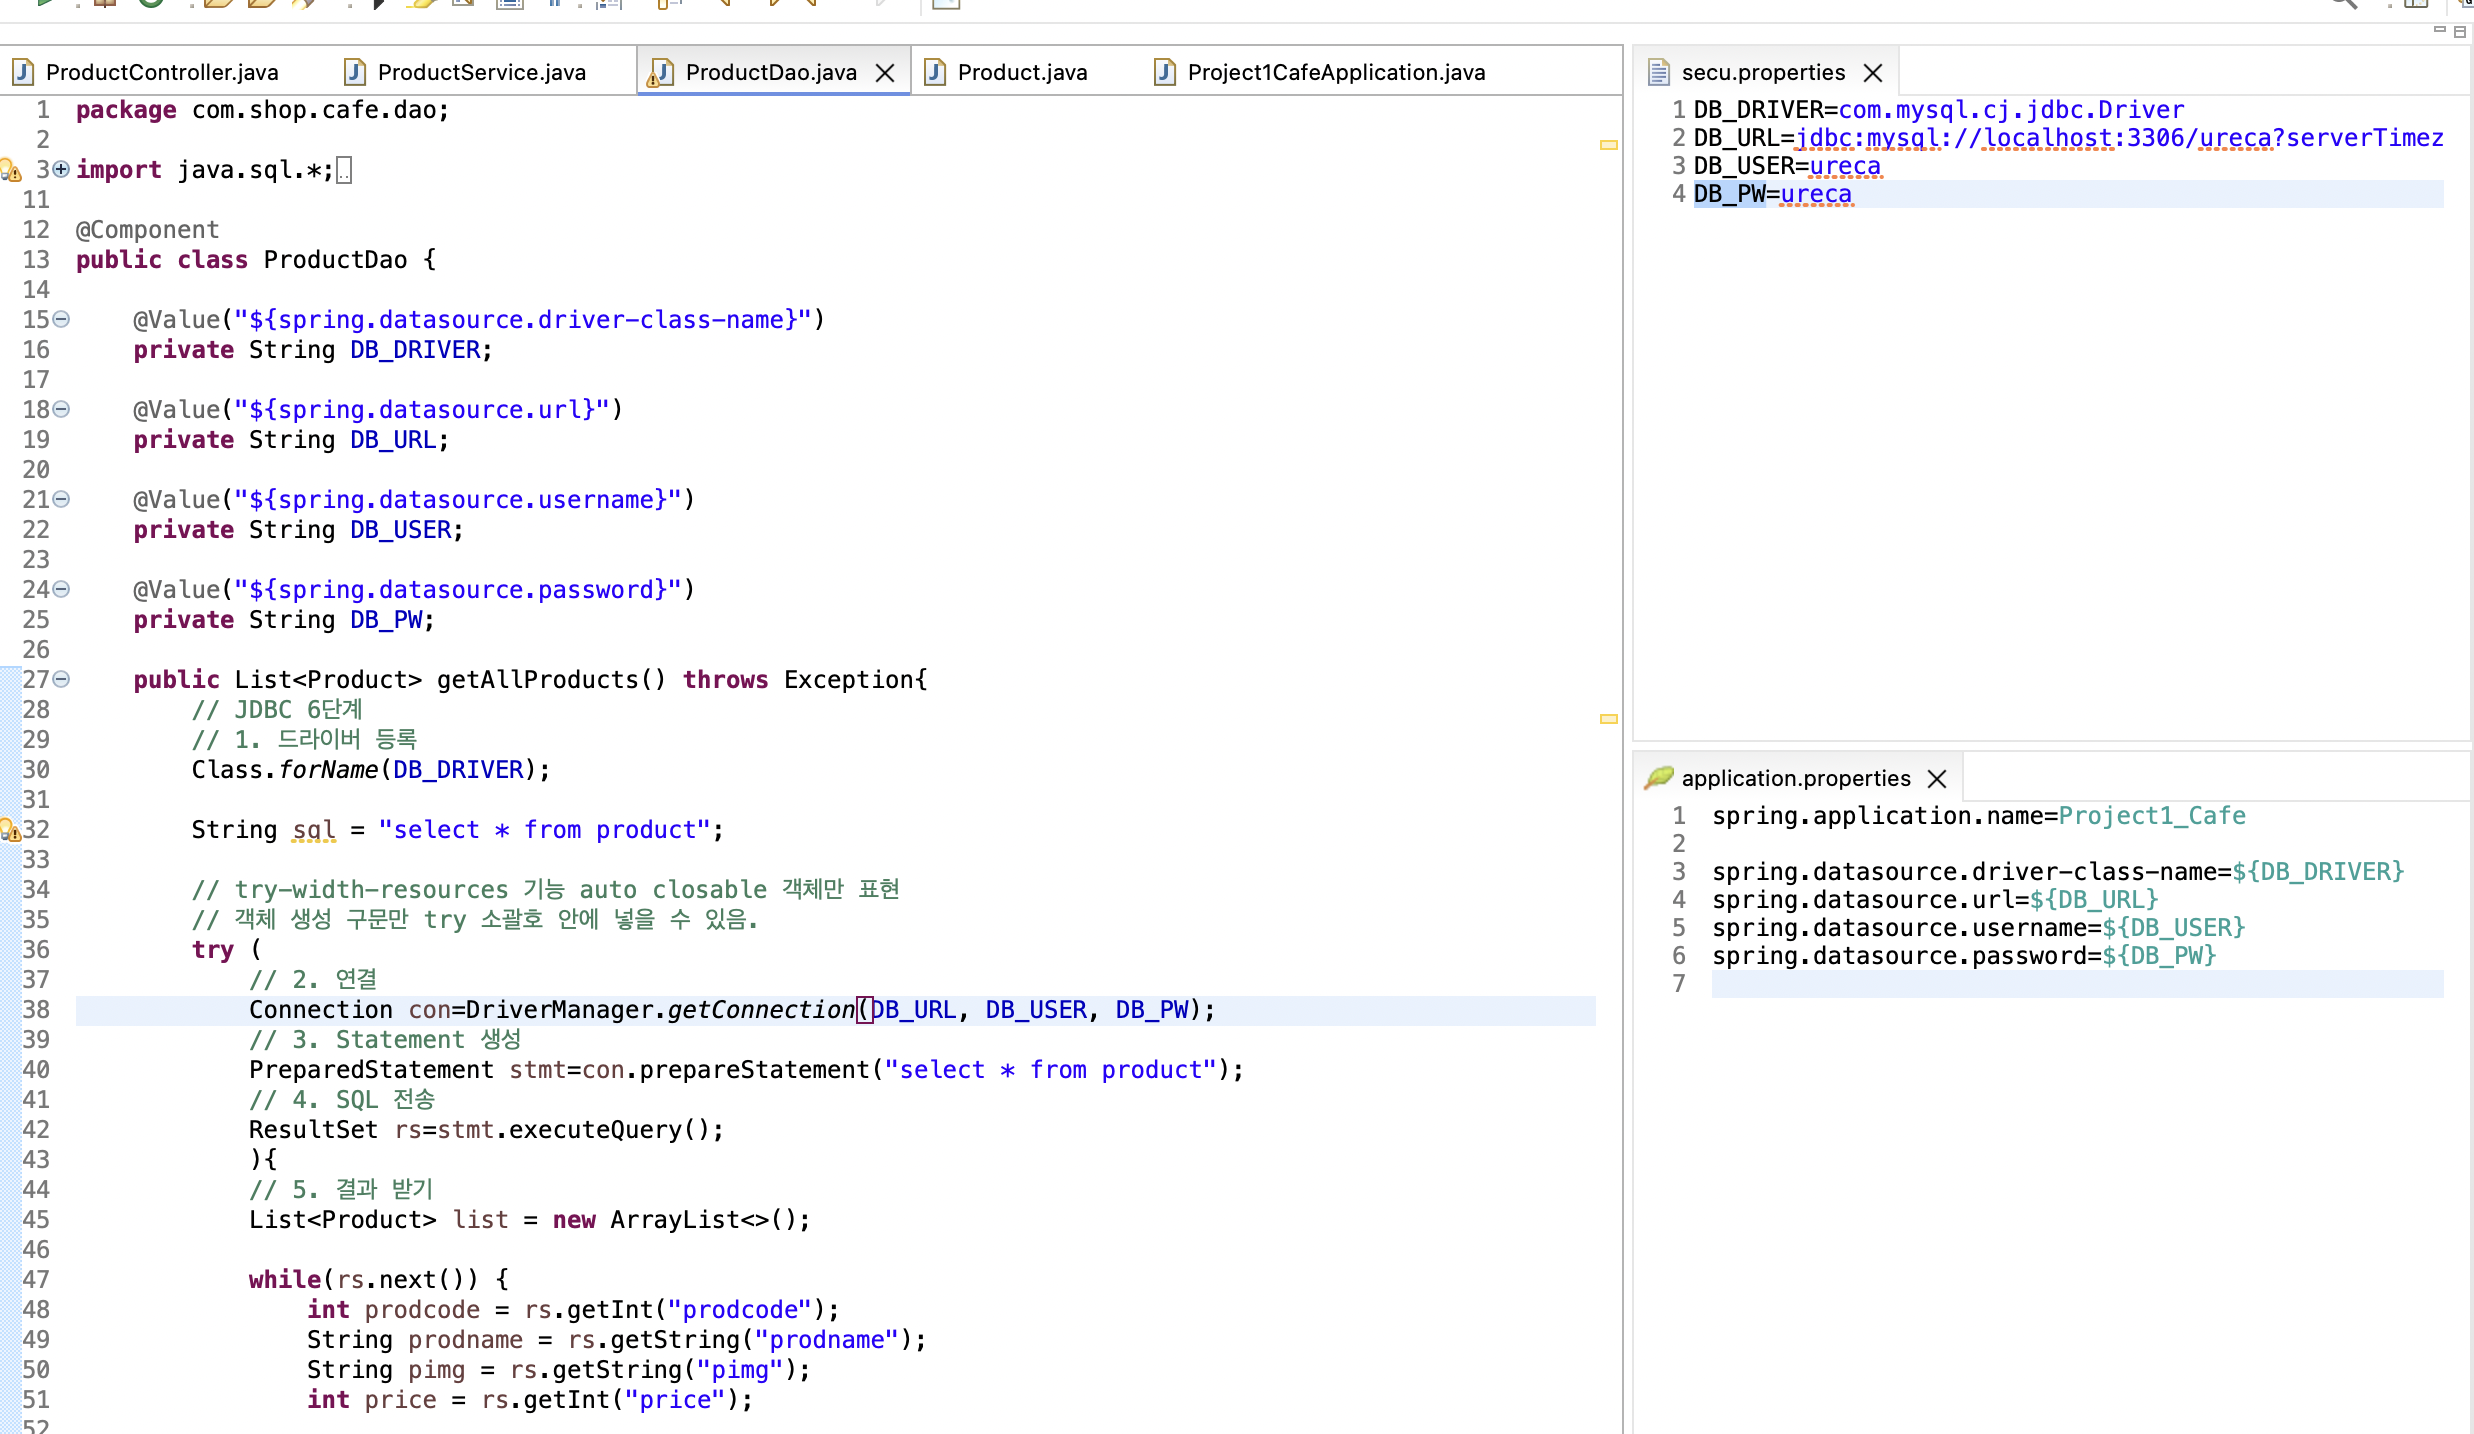
src/main/resources/config/secu.properties
👉 DB 접속 정보를 별도의 설정 파일에 저장
- 보안 강화를 위해 따로 분리하는 것이 일반적.
- 실무에서는 secu 같은 이름보다 일반적인 설정 파일처럼 보이도록 다른 이름을 사용하기도 함.
1
2
3
4
DB_DRIVER=com.mysql.cj.jdbc.Driver
DB_URL=jdbc:mysql://localhost:3306/ureca?serverTimezone=UTC
DB_USER=ureca
DB_PW=ureca
src/main/resources/application.properties
👉 secu.properties에 저장된 값을 가져와서 Spring Boot의 데이터베이스 설정으로 사용
${}문법을 이용해secu.properties의 값들을 불러옴.
1
2
3
4
spring.datasource.driver-class-name=${DB_DRIVER}
spring.datasource.url=${DB_URL}
spring.datasource.username=${DB_USER}
spring.datasource.password=${DB_PW}
com.shop.cafe.Project1CafeApplication.java
👉 Spring Boot 애플리케이션의 진입점 (Main Class)
@PropertySource("classpath:config/secu.properties")를 통해secu.properties파일을 로드.- 이 설정 덕분에
application.properties에서${DB_DRIVER}같은 값들을 사용할 수 있음.
1
2
3
4
5
6
7
8
9
10
11
12
import org.springframework.boot.SpringApplication;
import org.springframework.boot.autoconfigure.SpringBootApplication;
import org.springframework.context.annotation.PropertySource;

@SpringBootApplication
@PropertySource("classpath:config/secu.properties")
public class Project1Cafe2Application {

	public static void main(String[] args) {
		SpringApplication.run(Project1Cafe2Application.class, args);
	}
}
.gitignore
👉 보안 파일(secu.properties)을 Git에 올리지 않도록 설정
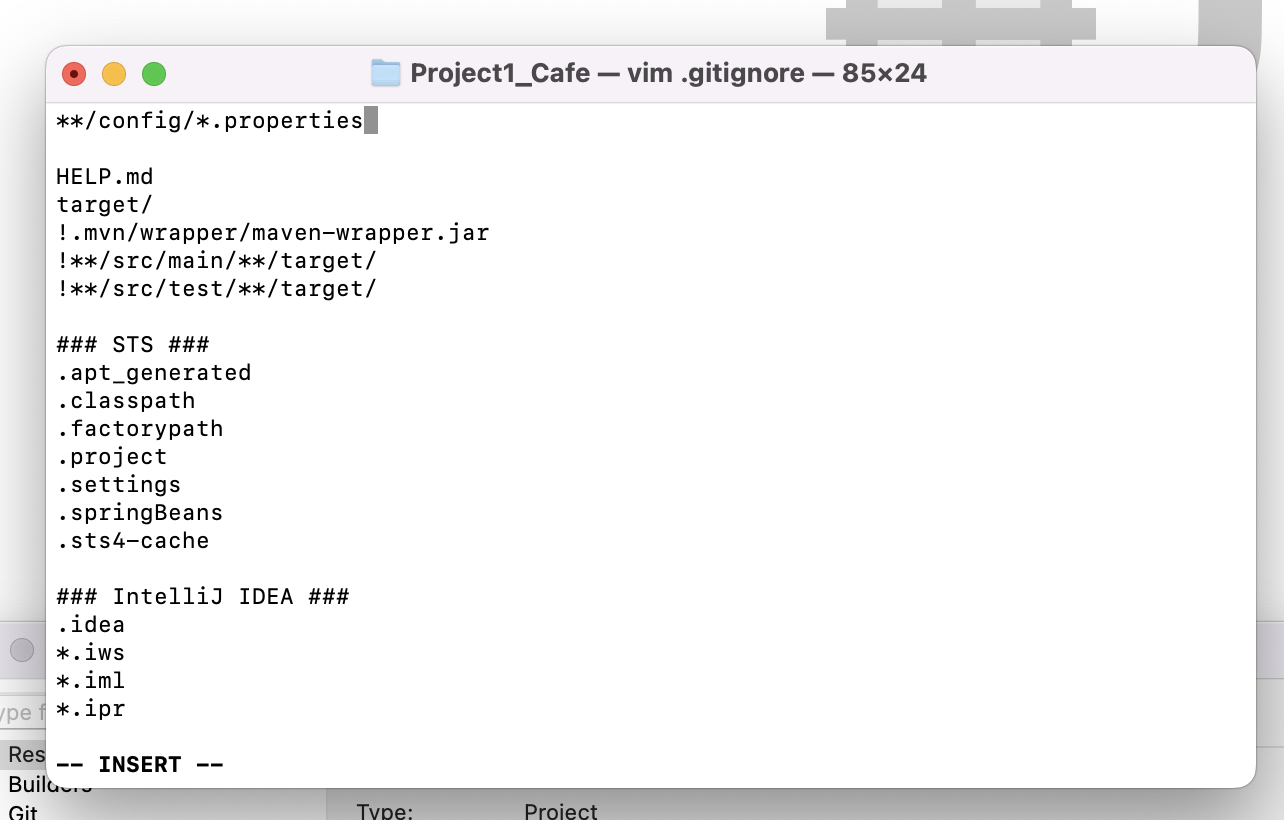
**/config/*.properties패턴을 추가하여config폴더 안의.properties파일은 Git에 포함되지 않도록 함.
1
**/config/*.properties
💡 맥북에서는 .gitignore 파일이 안보여서 터미널에서 ls 명령어로 해당 파일이 있는지 확인한 후, vim .gitignore명령어를 이용해 해당 코드를 추가했다.
ProductDao.java
👉 DB에서 제품 목록을 가져오는 DAO (Data Access Object)
@Value를 이용해application.properties에서 DB 설정 값을 가져옴.
Q. 왜 직접 DB_DRIVER, DB_URL, DB_USER, DB_PW 값을 적지 않고 @Value를 사용하는가?
A. 보안 강화를 위해 DB 정보를 코드에 하드코딩하지 않기 위해서!
1
2
3
4
5
6
7
8
9
10
11
12
13
14
15
16
17
18
19
20
21
22
23
24
25
26
27
28
29
30
31
32
33
34
35
36
37
38
39
40
41
42
43
44
45
46
47
48
49
50
51
52
53
54
55
56
57
58
import java.sql.*;
import java.util.*;

import org.springframework.beans.factory.annotation.Value;
import org.springframework.stereotype.Component;
import org.springframework.stereotype.Repository;
import org.springframework.web.bind.annotation.CrossOrigin;

import com.shop.cafe.dto.Product;
// @Component // 객체 생성과 삭제를 프레임워크에 의지하는 컴포넌트가 되겠다.
@Repository
// 저장소 컴포넌트임을 알림.
public class ProductDao {
	// Product에게 부탁하는 것임.
	@Value("${spring.datasource.driver-class-name}")
	private String DB_DRIVER;

	@Value("${spring.datasource.url}")
	private String DB_URL;

	@Value("${spring.datasource.username}")
	private String DB_USER;

	@Value("${spring.datasource.password}")
	private String DB_PW;

	public List<Product> getAllProducts() throws Exception{
		// JDBC 6단계
		// 1. 드라이버 등록
		Class.forName(DB_DRIVER);

		String sql = "select * from product";

		// try-width-resources 기능 auto closable 객체만 표현
		// 객체 생성 구문만 try 소괄호 안에 넣을 수 있음.
		try (
			// 2. 연결
			Connection con=DriverManager.getConnection(DB_URL, DB_USER, DB_PW);
			// 3. Statement 생성
			PreparedStatement stmt=con.prepareStatement("select * from product");
			// 4. SQL 전송
			ResultSet rs=stmt.executeQuery();
			){
			// 5. 결과 받기
			List<Product> list = new ArrayList<>();

			while(rs.next()) {
				int prodcode = rs.getInt("prodcode");
				String prodname = rs.getString("prodname");
				String pimg = rs.getString("pimg");
				int price = rs.getInt("price");

				list.add(new Product(prodcode, prodname, pimg, price));
			}
			return list;
		}
	}
}
회원가입 처리
백엔드 (BACK)
1. 데이터베이스 (MySQL) : Member 테이블 생성
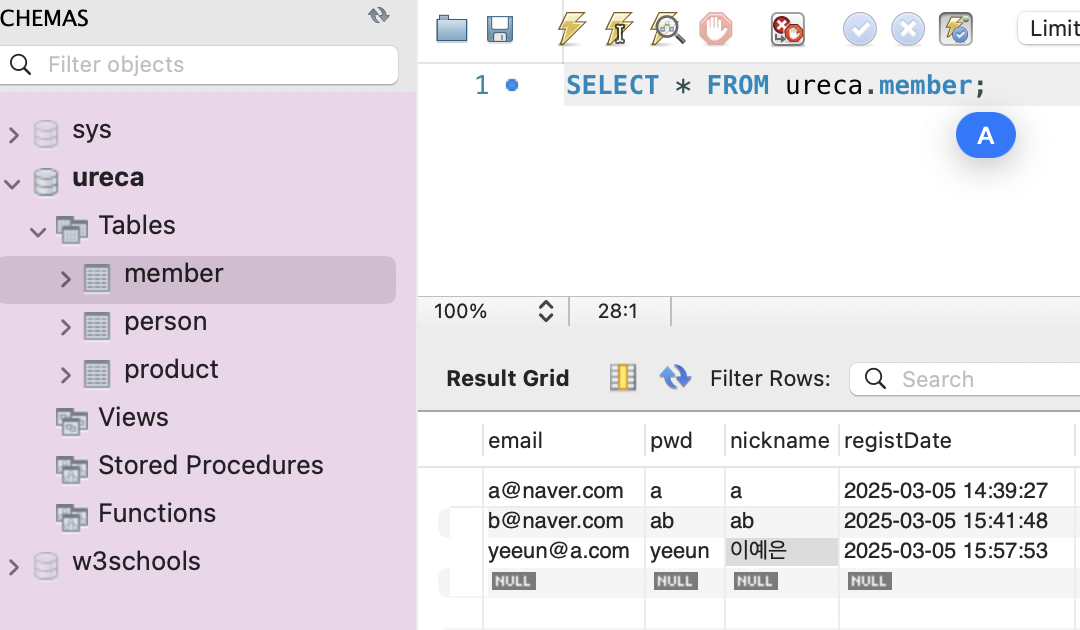
- registDate는 회원가입 시간을 자동 기록
1
2
3
4
5
6
create table member(
email varchar(50) primary key,
pwd varchar(256) not null,
nickname varchar(20) not null unique,
registDate timestamp default current_timestamp
);
2. 데이터 모델(DTO) : Member.java
- member 테이블과 매핑되는 객체
- 회원 정보를 저장하는 필드 및 getter, setter 포함
1
2
3
4
5
6
7
8
9
10
11
12
13
14
15
16
17
18
19
20
21
22
23
24
25
26
27
28
29
30
31
32
33
34
35
36
37
38
39
40
41
42
43
44
45
46
47
package com.shop.cafe.dto;
import java.util.Date;

public class Member {
	private String email, pwd, nickname;
	private Date registDate;
	public String getEmail() {
		return email;
	}
	public void setEmail(String email) {
		this.email = email;
	}
	public String getPwd() {
		return pwd;
	}
	public void setPwd(String pwd) {
		this.pwd = pwd;
	}
	public String getNickname() {
		return nickname;
	}
	public void setNickname(String nickname) {
		this.nickname = nickname;
	}
	public Date getRegistDate() {
		return registDate;
	}
	public void setRegistDate(Date registDate) {
		this.registDate = registDate;
	}
	public Member() {
		super();
		// TODO Auto-generated constructor stub
	}
	public Member(String email, String pwd, String nickname, Date registDate) {
		super();
		this.email = email;
		this.pwd = pwd;
		this.nickname = nickname;
		this.registDate = registDate;
	}
	@Override
	public String toString() {
		return "Member [email=" + email + ", pwd=" + pwd + ", nickname=" + nickname + ", registDate=" + registDate
				+ "]";
	}
}
3. 데이터 접근 계층(DAO) : MemberDao.java
🔹 데이터베이스와 연결하여 회원 정보를 저장하는 역할
@Repository: Spring에서 DAO 클래스로 인식하도록 설정- DB 연결 정보를 @Value를 통해 application.properties에서 가져옴
- SQL 실행 : INSERT INTO 문을 사용하여 회원 정보를 DB에 추가
1
2
3
4
5
6
7
8
9
10
11
12
13
14
15
16
17
18
19
20
21
22
23
24
25
26
27
28
29
30
31
32
33
34
35
36
37
38
39
40
41
42
43
package com.shop.cafe.dao;

import java.sql.Connection;
import java.sql.DriverManager;
import java.sql.PreparedStatement;

import org.springframework.beans.factory.annotation.Value;
import org.springframework.stereotype.Repository;

import com.shop.cafe.dto.Member;

@Repository // Repository component 임을 알려줌
public class MemberDao {
	// Product에게 부탁하는 것임.
	@Value("${spring.datasource.driver-class-name}")
	private String DB_DRIVER;

	@Value("${spring.datasource.url}")
	private String DB_URL;

	@Value("${spring.datasource.username}")
	private String DB_USER;

	@Value("${spring.datasource.password}")
	private String DB_PW;

	public void insertMember(Member m) throws Exception {
		Class.forName(DB_DRIVER);
		String sql = "insert into member(nickname, pwd, email) values(?, ?, ?)";

		try(
			Connection con=DriverManager.getConnection(DB_URL, DB_USER, DB_PW);
			PreparedStatement stmt = con.prepareStatement(sql);
			) {
			stmt.setString(1, m.getNickname());
			stmt.setString(2, m.getPwd());
			stmt.setString(3, m.getEmail());
			int i = stmt.executeUpdate();

			System.out.println(i+"행이 insert 되었습니다.");
		}
	}
}
4. 서비스 계층 (Service) : MemberService.java
🔹 DAO를 호출하여 회원 정보를 저장하는 역할
1
2
3
4
5
6
7
8
9
10
11
12
13
14
15
16
17
package com.shop.cafe.service;

import org.springframework.beans.factory.annotation.Autowired;
import org.springframework.stereotype.Service;

import com.shop.cafe.dao.MemberDao;
import com.shop.cafe.dto.Member;

@Service
public class MemberService {
	@Autowired
	MemberDao memberDao;

	public void insertMember(Member m) throws Exception {
		memberDao.insertMember(m);
	}
}
5. 컨트롤러 (Controller) : MemberController.java
🔹 REST API 엔드포인트를 제공하여 회원가입 요청을 처리
@RestController: JSON 데이터를 주고받기 위해 사용@PostMapping("insertMember"): 프론트에서 요청한 회원 가입을 처리@RequestBody: 클라이언트에서 보낸 JSON 데이터를 Member 객체로 변환- body를 받아와줘라는 뜻임 !
1
2
3
4
5
6
7
8
9
10
11
12
13
14
15
16
17
18
19
20
21
22
23
24
25
26
27
28
29
30
31
32
33
34
35
36
package com.shop.cafe.controller;

import java.util.HashMap;
import java.util.Map;

import org.springframework.beans.factory.annotation.Autowired;
import org.springframework.web.bind.annotation.CrossOrigin;
import org.springframework.web.bind.annotation.PostMapping;
import org.springframework.web.bind.annotation.RequestBody;
import org.springframework.web.bind.annotation.RestController;

import com.shop.cafe.dto.Member;
import com.shop.cafe.service.MemberService;

@RestController
@CrossOrigin("http://127.0.0.1:5500/")
public class MemberController {

	@Autowired
	MemberService memberService;

	@PostMapping("insertMember")
	public Map<String, String> insertMember(@RequestBody Member m) {

		Map<String, String> responseData = new HashMap();
		try {
			memberService.insertMember(m);
			responseData.put("msg", "ok");
		} catch (Exception e) {
			// TODO Auto-generated catch block
			e.printStackTrace();
			responseData.put("msg", e.getMessage());
		}
		return responseData;
	}
}
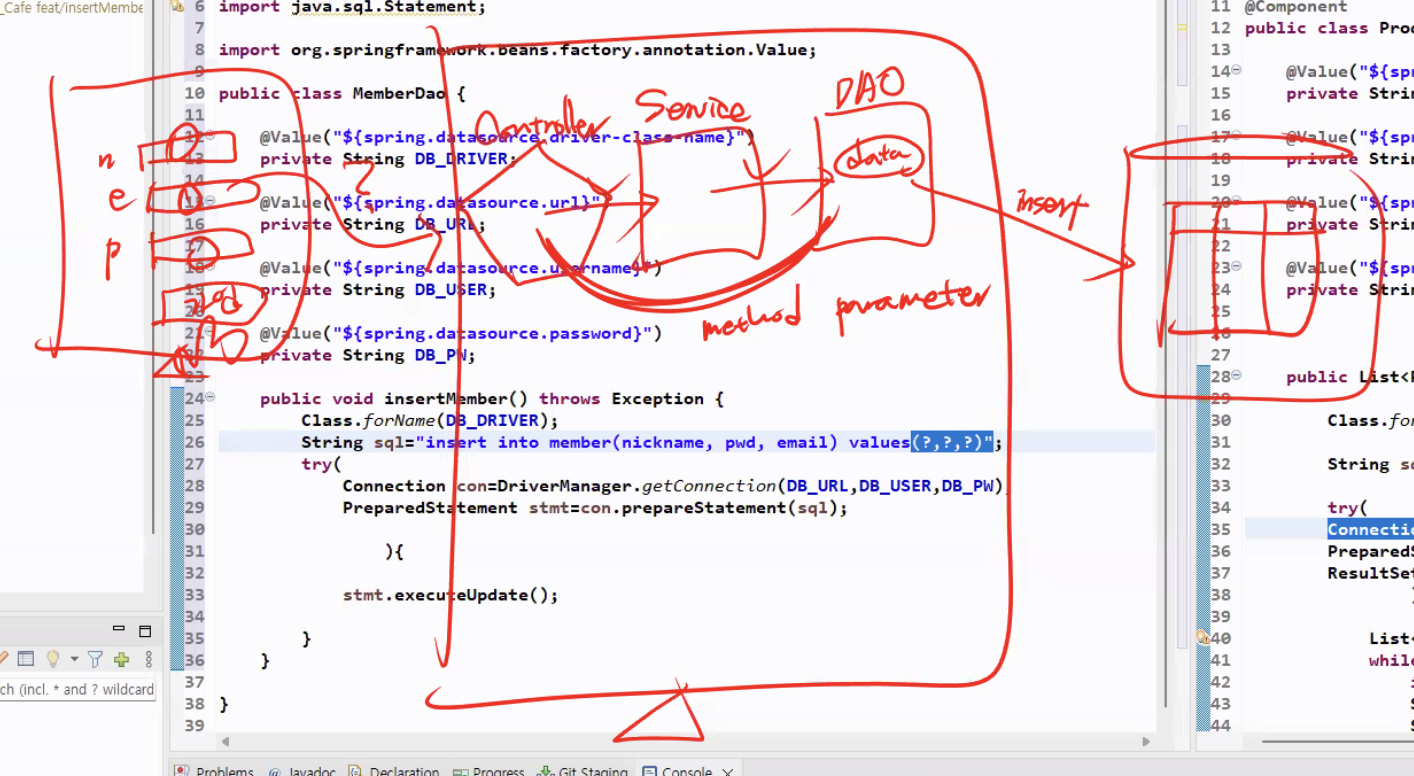
백엔드에서 데이터를 주고받는 프로세스
프론트엔드 (FRONT)
index.js (회원가입 이벤트 처리)
- 사용자가 입력한 회원가입 정보를 서버에 전송
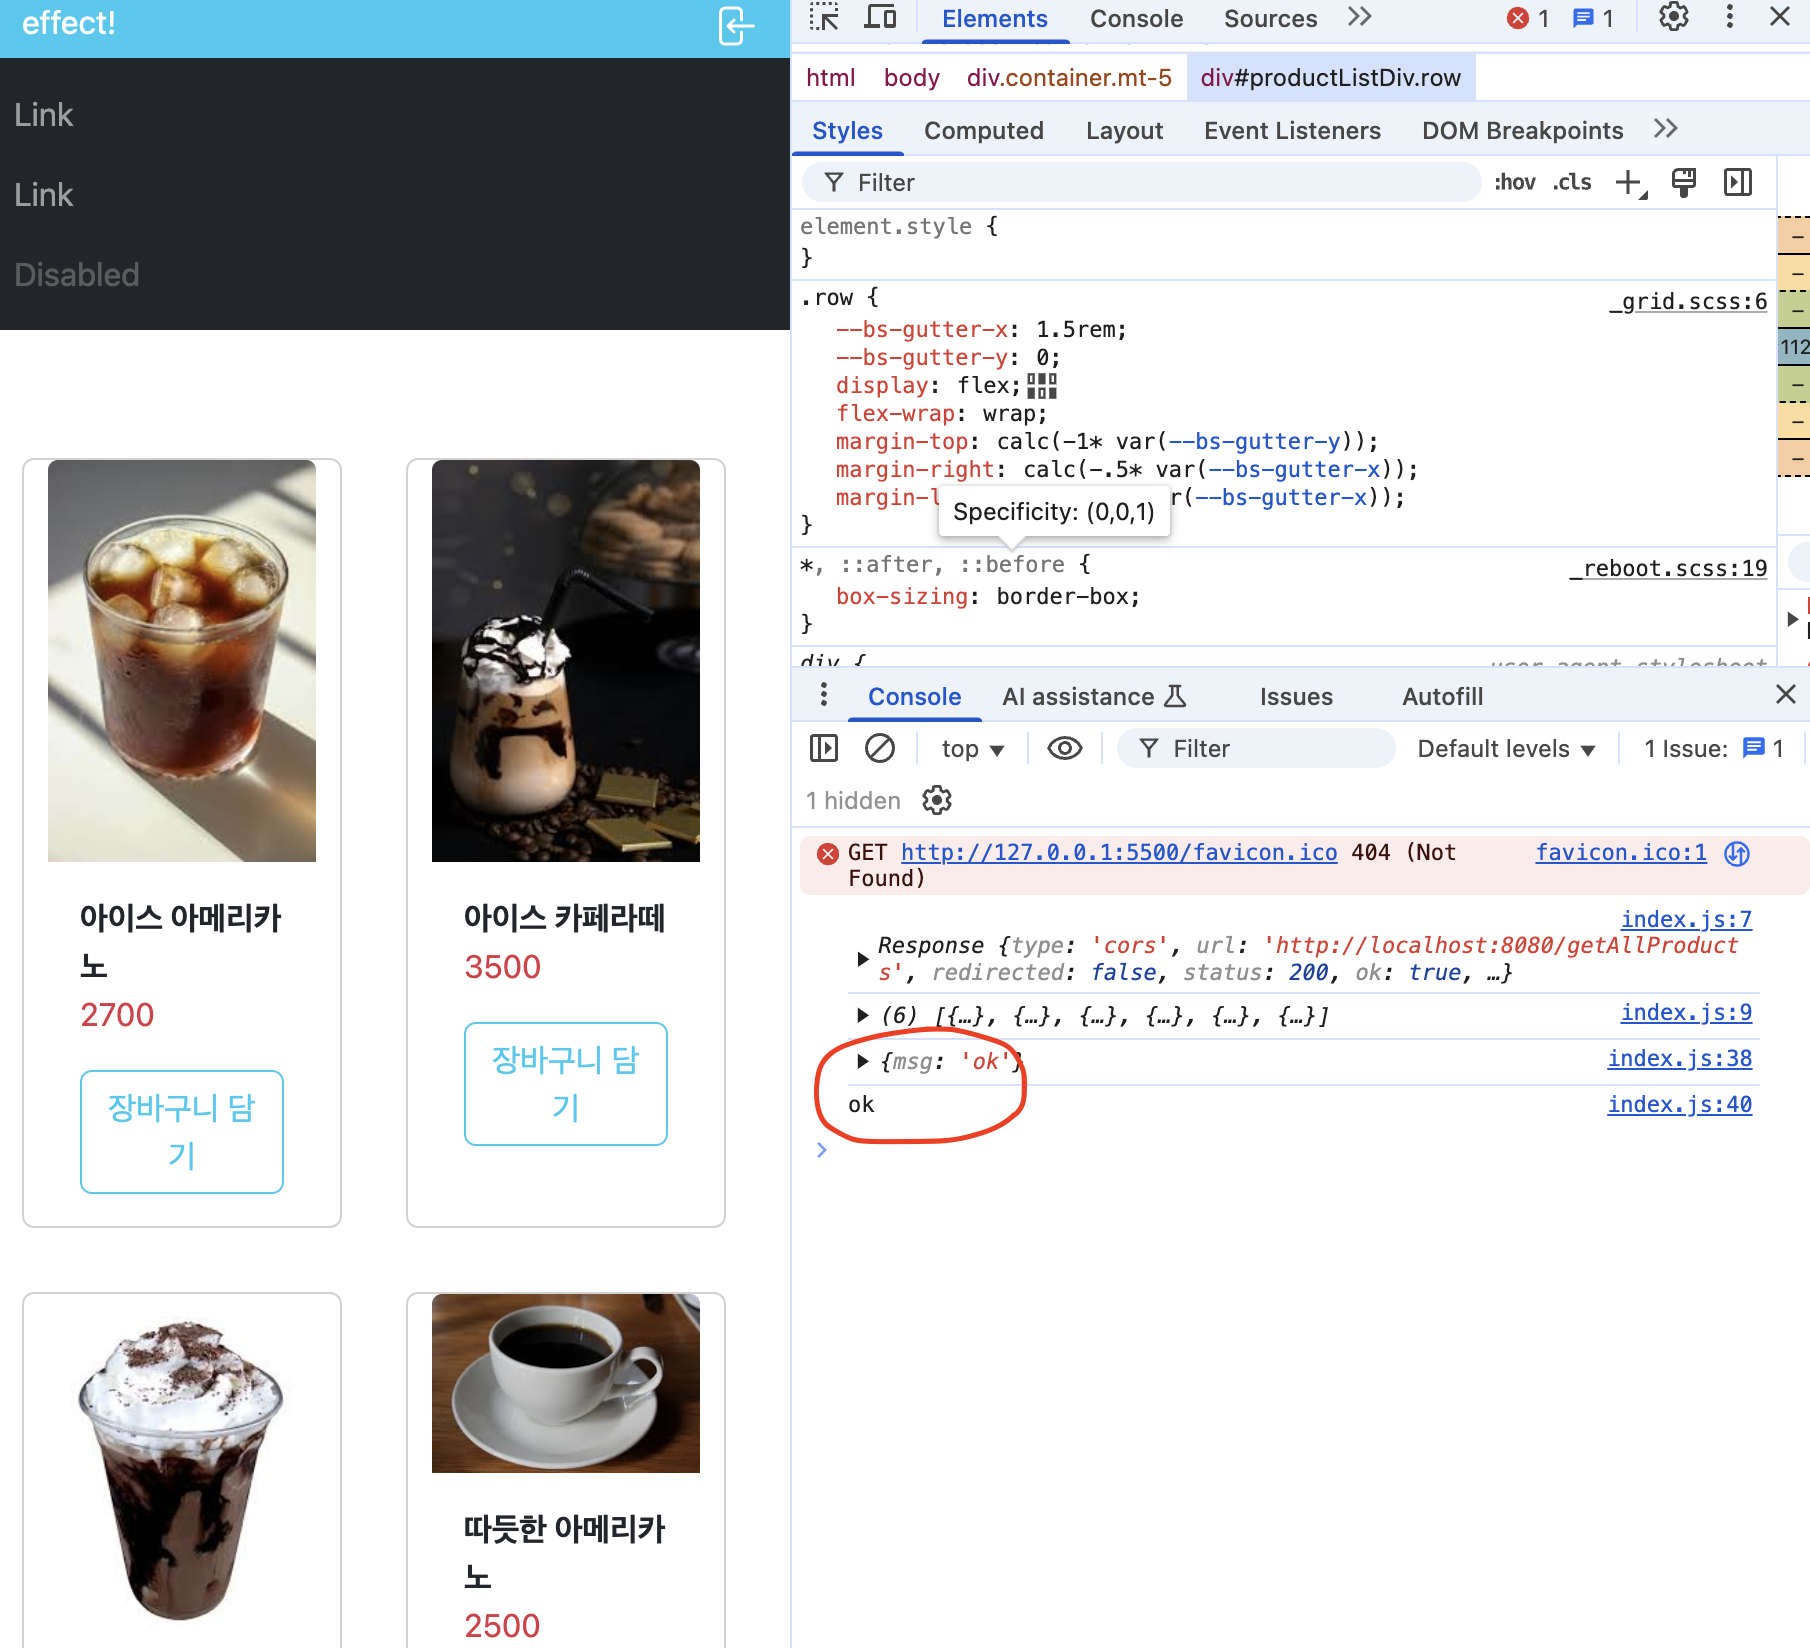
- 서버에서 ok 응답을 받으면 모달을 닫고 UI 변경
- 회원가입 실패 시 alert 메시지 출력
1
2
3
4
5
6
7
8
9
10
11
12
13
14
15
16
17
18
19
20
21
22
23
24
25
26
27
28
29
30
document.getElementById("signupBtn").addEventListener("click", async () => {
  const nickname = document.getElementById("nickname").value;
  const email = document.getElementById("email").value;
  const pwd = document.getElementById("pwd").value;
  const data = { nickname, email, pwd };
  let response = await fetch("http://localhost:8080/insertMember", {
    method: "POST",
    headers: {
      "Content-Type": "application/json",
    },
    body: JSON.stringify(data),
  });
  response = await response.json();
  console.log(response);
  if (response.msg === "ok") {
    console.log("ok");
    const modal = bootstrap.Modal.getInstance(
      document.getElementById("signupModal")
    );
    modal.hide();
    document.getElementById(
      "loginSpan"
    ).innerHTML = `<svg xmlns="http://www.w3.org/2000/svg" fill="none" viewBox="0 0 24 24" stroke-width="1.5" stroke="currentColor" class="size-6" width="24" height="24">
  <path stroke-linecap="round" stroke-linejoin="round" d="M15.75 9V5.25A2.25 2.25 0 0 0 13.5 3h-6a2.25 2.25 0 0 0-2.25 2.25v13.5A2.25 2.25 0 0 0 7.5 21h6a2.25 2.25 0 0 0 2.25-2.25V15M12 9l-3 3m0 0 3 3m-3-3h12.75" />
</svg>`;
    document.getElementById("signupLi").remove();
  } else {
    alert(response.msg);
  }
});
